Wifi/SNTP Clock for the Atari ST/TT/Falcon
(C) 2016 - 2022 Christian Zietz <czietz@gmx.net>
Software and schematic are provided free of charge and "as is", without warranty of any kind. They may be used and distributed freely for non-commercial purposes. You must contact me for approval if you intend to sell hardware using the provided software and/or schematic.
This project allows for the synchronization of your Atari's date and time to the Internet via Wifi, using the low-cost ESP8266 microcontroller. It is connected to the serial port. No more hassle with imprecise RTCs, empty batteries, and daylight savings time!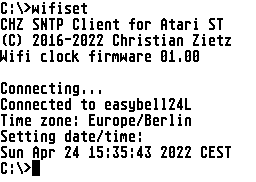
Building the hardware
See schematic:
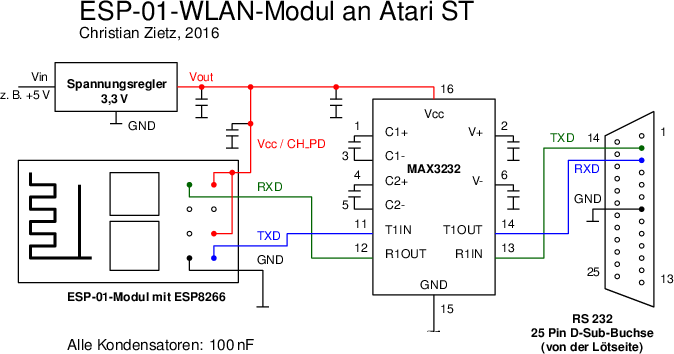
Note that for newer models (such as the TT and Falcon) you might need a D-Sub 9 connector instead.
Any ESP8266-based module with at least 1 MiB of flash memory, such as the ESP-01, may be used. The ESP8266 requires a regulated 3.3 V power supply capable of supplying about 200 mA. Furthermore, it must not be connected directly to the Atari's serial port because of incompatible voltage levels. An RS232 level converter, such as the MAX3232, must be used. ESP8266 modules as well as suitable level converters and voltage regulators are available as pre-built modules from sellers on eBay or AliExpress.
Flashing the firmware
The firmware uses the NodeMCU interpreter. For easy installation, I provide a complete image (containing the interpreter and the actual firmware) that needs to be flashed to the ESP8266. This can be done with your preferred ESP8266 flash tool. If you don't already have one, I recommend getting a cheap USB programmer when buying your ESP8266 module.
For my ESP-01 board, I use esptool and the following command – you have to adapt com8 to the serial port you want to use for flashing:
esptool.py --port com8 erase_flash
esptool.py --port com8 write_flash --flash_size detect 0 fullflash_0100.bin
Configuring and using the module
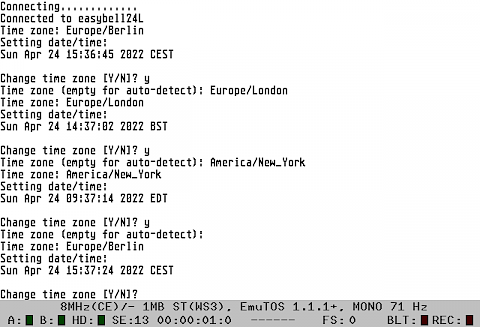
Copy WIFICONF.TOS and WIFISET.TOS to your Atari. Connect the module to the Atari's serial port and supply it with power. Run WIFICONF.TOS. This configuration program lists all Wifi networks that are visible to the module. It asks you to type the SSID (name of your network) as well as the password. Then, it connects to your Wifi network, synchronizes the time, and attempts to auto-detect your time zone based on your IP address.
If the displayed time is wrong, you can manually enter your time zone. Any IANA time zone name is accepted, such as Europe/Berlin or America/New_York (note the use of underscores instead of spaces). In case an unknown zone is entered, the module falls back to UTC.
All configuration is stored in the flash memory of the module and thus retained while the computer and module are switched off.
Copy WIFISET.TOS to your AUTO folder and rename it to WIFISET.PRG to enable date and time synchronization during boot.